Blog

  • Building the bar

    Nails and a hammer

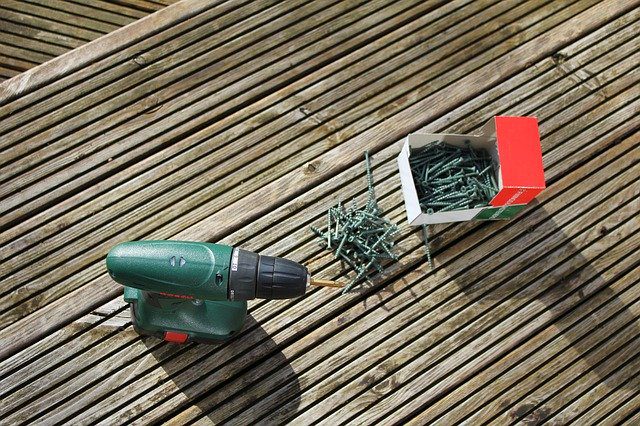
    Step 1 – Add some posts to support the bar

    Cut 4 pieces of timber to the same height of the window. Secure two of the posts against the inside of the front wall. Decide how wide you want your bar to be. We would recommend half a metre (50cm) wide. Use your measuring tape to measure the distance and mark the floor with a pencil. Once you are happy, secure them in place.

    Step 2 – Create the top of the bar

    Create the top of your bar by cutting some plywood into shape. This should sit on top of the support posts, with a slight overhang at the front if you would prefer. Once you’re happy with the placement, secure it into place using a hammer and nails.

    Step 3 – Cover the exposed side

    To ensure that everything you store under the bar stays hidden, you can cover up the exposed side using some plywood. Measure the height of the posts and the width of the bar to find the dimensions. Once you’ve cut the plywood into place, secure it onto the side of the bar using a hammer and nails.

    And there you have it! An outdoor bar in your own garden, perfect for entertaining guests and celebrating with your family.

    Added Extras

    Fairy Lights

    Put up shelves on the back wall

    To store your alcohol, you can put up some shelves on the back wall. Make sure they are level using a spirit level, and add some brackets underneath for extra support.

  • Building the decking

    A drill and screws on some decking boards

    Step 1 – Measure your decking boards

    You should now move on to building the decking in front of your bar. Measure your decking boards to fit the space between your shed and the end of the platform. Safely cut them to size using a chop saw.

    Step 2 – Secure the decking boards

    Next, lay down your decking boards to ensure they fit correctly, using a spirit level to check they are level. You can then fix them into place, using 50mm screws.

    Step 3 – Add posts to the corners

    Add some wooden posts to the corners to support your handrail. Once they are level, fix them into place with some 100mm screws.

    Step 4 – Add the railings

    Cut the railings into the right length and screw them into place. Make sure these are extra secure.

    Step 5 – Insert some spindles

    Finally, cut some spindles to the correct length and secure these into place, evenly distributing them. We would recommend securing them two inches apart.

  • Cut your timber to size

    Cut two pieces of timber for the width and six pieces of timber for the length. You will need the four extra lengths to create inner joists. Position them in place before fixing together, to ensure that everything is the right size.

    Step 3 – Assemble the base

    Fix the outer frame together using an electric drill and screws. Next, place your inner joists within the frame and ensure they are equally spaced using a tape measure. Once you are happy, screw these lengths into the frame.

    Building the shed

    Garden shed

    Step 1 – Lay down the floor

    Lay down the floor of your shed on top of your platform. Check it is level using your spirit level. Once you’re happy, secure it in place.

    Step 2 – Put up the walls

    Erect your walls and secure them into place. You may need help from a family member in order to do this safely.

    Step 3 – Attach the roof support bar

    Measure the centre of your front and back panels to ensure that the roof support bar will be central. Fix this into position.

    Step 4 – Adding the roof panels

    You can now fix your roof panels to make the shed watertight. Once they are secure, you can add roofing felt, using felt tacks to keep it in place.

    Step 5 – Attach trims and fascia boards

    Finally, you can attach any trims which came with your shed, and fix the fascia boards on the front, covering the felt. You should pre-drill the holes to prevent them from splitting.

  • How To Build An Outdoor Garden Bar

    On long summer evenings, we all love to spend time in the garden with friends and family and have a barbecue. By creating your own outdoor bar, you can entertain your guests all night long. This is a great idea for your back garden, as well as for restaurants and pubs.

    You can build your own structure using timber, or for an easy alternative, you can use a wooden shed as the main structure. Follow our helpful instructions to build your own outdoor bar or for general garden bar ideas to make the most of your summer evenings.

    Before You Start

    Before you start building, you need to prepare the area in which you’ll be building your bar. Remove any garden furniture or debris, sweep up any leaves, and ensure that the ground is level. If this preparation requires moving or lifting heavy items, ensure that you ask a family member for help.

    You will need a fair amount of equipment to ensure that your outdoor bar is safely put together. We have included the equipment to build a platform for your bar to sit on, as well as the recommended shed style for your bar.

  • Following this, you should look to thoroughly rinse off the moss killer

    Following the preparation stage, you should now look to apply a non-oil-based moss killer onto the artificial grass/lawn. However, for the best results, we recommend doing so when the moss is actively growing and only when weather conditions are dry and no moisture is present/anticipated for several hours.

    It is also vitally important to follow the manufacturer’s instructions as not all moss killers are the same. Following this, you should look to thoroughly rinse off the moss killer (if the manufacturer states). Once the moss has dried out and died, you will need to sweep/rake it to one side to make collecting and binning it easier.

    And that’s it – for now at least! We do recommend that you reapply the moss killer once every few weeks if you continue to see moss growth.

    If you need any further advice on artificial grass maintenance, get in touch with our friendly team.

  • How to Remove Moss from Artificial Grass with Moss Killer

    Invented over 50 years ago, artificial grass is a surface of synthetic fibres made to look identical to natural grass. Today, you can find it nearly everywhere you look, from residential lawns to sports centres and stadiums.

    Compared to conventional grass, artificial grass is able to stand up to heavy use whilst needing no trimming or irrigation – making it perfect for those who need a low-maintenance lawn. However, this isn’t to say that it’s “maintenance-free”. Like all man-made products, artificial grass does have a limited life span. However, with the proper maintenance and care, you can expect it to last up to (and even beyond) it’s estimated lifespan.

    When caring for artificial lawns, one of the main issues owners face is moss. This typically takes the form of dense green clumps or mats and often occurs in damp or shady locations. Luckily, the method for removing moss is straightforward and can be done with relative ease. The basic steps are outlined below.

    Preparation

    Before you start, here’s a list of things that you’ll need:

    • A soft-bristled broom/brush or plastic rake
    • Moss killer (preferably non-oil-based)
    • Pruning shears or loppers
    1. Once you’re ready, you’ll need to brush/rake the artificial turf – we recommend you do this either weekly or whenever debris accumulates.
    2. When it comes to brushing/raking, you should alternate your direction each time to ensure a deep clean. This will also help prevent all the fibres from leaning in one direction.
    3. Once all debris is clear, take your pruning shears/loppers and go around the garden/lawn and trim back any overhanging branches and overgrown vegetation. This will allow for better circulation of air whilst allowing more sunlight to reach the lawn. The goal here to try and eliminate the conditions that favour moss development.
  • Weed Barrier Fabric and Used Artificial Grass


    Used artificial grass costs 50% to 75% less than new artificial grass, which is great on your budget!

    However, used artificial grass may come with punctures from the forklifts that moved them. Proper installation of the used artificial grass will hide these punctures, but they could possibly allow a sliver of sunlight to reach the soil beneath it. Where sunlight can reach the earth, weeds will grow. This means that a weed suppressant membrane is even more critical when you install used artificial grass.

    If you are interested in used artificial grass but have pets, regular maintenance and pet-friendly infill can mask any odors trapped by weed barrier.

    Weed barrier fabric can mean the difference between a lush, realistic layer of artificial turf and lumps that weeds have pushed up. As long as you don’t have plans for the ground under your artificial turf, weed barrier can add years to the lifespan of your artificial grass with no downsides.

  • Should You Put Weed Barrier Down Before or After Installing a Base Layer?


    First, let’s go over why you need a base layer. The base layer creates a level platform and provides drainage for artificial turf. When installing a synthetic grass base layer, excavate 3 to 4 inches of topsoil. The best materials for the base layer are 3 inches of class II road base followed by an inch of decomposed granite (also known as granite dust). 

    You can lay weed barrier fabric under the base layer, over the base layer, or both.

    Lay the landscaping fabric under the base layer to prevent contamination and provide a ground stabilization membrane.

    If the native soil is hard (as opposed to clay-like), there is no need to install weed barrier fabric under the base material. Simply lay the weed suppressant membrane over the base.

  • When Should You Avoid Weed Barrier Fabric?


    Now that we have shared a few reasons for installing landscape fabric for synthetic turf, it’s time to explain why weed barrier is not right for some artificial grass projects. 

    1. When You Have Pets Who Go to the Bathroom Outdoors
      If you have pets that will use artificial turf as a bathroom, you should be aware that weed barrier fabric will soak up liquid waste and create lasting odors. This is the main reason why some people with artificial turf choose not to install weed barrier.

    However, if you have pets and still want to benefit from the protection and stability of weed barrier fabric, you can use a turf deodorizer like ZeoFill infill. ZeoFill infill is made of 100% natural materials and prevents the ammonium in pet urine from turning into a bad-smelling gas.

    ZeoFill infill is just one of several pet-friendly options when choosing infill for your artificial turf.

    1. If You Want to Remove Your Artificial Grass in the Future
      Weed barrier fabric is excellent at preventing soil aeration and stopping weed growth, but this also leads to less healthy soil. This could be a problem if you decide to remove the artificial grass at some point and choose to grow a garden. The ground covered by the weed barrier cloth will not be conducive to thriving plant life, and you will have difficulty growing a garden there.
  • Get Weed Barrier for Artificial Turf 

    Wondering why you should invest in a weed barrier? A weed barrier: 

    1. Blocks Weed Growth

    The fabric blocks sunlight from reaching the soil. Weeds need sunlight to grow. Even if a stubborn weed pops its head out of the ground beneath your artificial grass, the weed barrier cloth physically stops the weed from reaching the artificial turf. As its name suggests, it acts as a barrier between the weed and the synthetic turf. 

    2. Prevents Soil Aeration

    When soil is aerated, more oxygen gets into the soil, promoting weed growth. One of the most significant natural sources of soil aeration is the earthworm, eating its way through the soil, loosening it up, and leaving tunnels for water, nutrients, and air to reach weed seeds buried in the dirt. 

    The more earthworms in your soil, the more likely it is that weeds will be able to grow and thrive. Landscape cloth for synthetic turf is a barrier that will keep the earthworms at bay. They won’t want to live where they can’t reach the surface. With fewer earthworms, weeds will have a more challenging time reaching your turf. 

    3. Provides Ground Stabilization

    You want a solid base for your artificial turf. If there is loose or rocky soil beneath your artificial turf, you could end up with bumps and dips that make it less comfortable to walk on. Weed barrier fabric adds stability, especially if it is a woven weed barrier. It provides an extra layer of firmness and helps prevent soil erosion, so you don’t have to worry about the elements destroying the base of your artificial turf. 

    4. Protects Synthetic Grass

    Besides stabilizing the ground beneath the artificial grass, the weed barrier cloth cushions the artificial turf from whatever is in the soil beneath it. Sharp debris, such as pebbles and rocks, can puncture your artificial grass (if there is no base layer). A layer of weed barrier cloth under your turf adds protection. You want to avoid punctures in your synthetic grass because they can weaken the turf and make it susceptible to more damage. 

    5. Prevents Base Contamination

    Weed barrier can separate the native soil from the base layer (also known as the sub-base layer). If contaminants are in your native soil, you could also get impurities in the base layer unless weed barrier fabric is in place. A weed barrier helps keep the base layer clean.