We believe that it’s incredibly important for DIYers and homeowners looking for a turnkey installation to have every bit of knowledge they can get – and for landscape professionals to go into every job prepared.
Our goal is to educate our customers to make the best decisions for their projects, not sell them products that they don’t need. With this guide, you can be assured that you have the knowledge to start planning your artificial grass project, and the understanding of what our installation crews and team members do to help you get the lawn of your dreams.
Illustrations and Visualization Now to illustrate your estimate and calculations with drawings of the job site. These drawings should be to scale and as accurate as possible, seeing as they will be used as references when quoting and planning the job – such as indicating the placement of a perimeter product, seams, and the grain of the turf. Though there is no perfect plan, in the end, there are a variety of ways to approach every project; simply do your best to be smart and creative.
Below are some examples of project illustrations from our install managers:
Notice how the estimator draws arrows to indicate the main vantage point of the job site – where the majority of spectators will be when viewing the lawn. For the most aesthetic outcome, it is recommended to install turf in such a way that the grain or direction of the grass is pointing toward the main vantage point. As previously mentioned, installing turf in this way is not a hard and fast rule, and is often disregarded if orienting the turf in a different direction could conserve material.
Illustrations will also greatly assist in calculating the material and labor required for seams, if applicable. The estimator will draw dotted lines of the grass’ roll width to indicate where individual pieces would meet and be seamed. This visualization helps to accurately place and measure seam lengths so that you know exactly how many nails or how much seam tape your project requires.
Now it’s time to measure. You can begin with measuring the total linear footage of the perimeter – most easily achieved using a measuring wheel. Walking the perimeter line with your measuring wheel will allow you an opportunity to determine where a perimeter product should be installed and how much of it you need. Remember that steeply graded areas or areas without a constructed restraint, such as a retaining wall or sidewalk, will likely require a perimeter board – such as Bend-a-Board.
preparing for artificial grass perimeters This 1.5″x1.5″x12′ Bend-a-Board acts as a perimeter for the artificial turf being installed against a fence.
Next, calculate the actual square footage. To do so, simply multiply the length and width of the install area, but don’t forget to subtract planters, trees, and other areas within the perimeter that would not be replaced with turf, as the goal is to establish the true square footage so that we know the minimum amount of artificial grass required. If needed, here is a handy square footage calculator.
After you’ve established the length of the perimeter and calculated the true square footage, you will have enough information to determine the linear footage of grass required for the project. Though, factors such as the grass’ roll width, the desired grain orientation, as well as the shape and size of the installation area will impact this number. For example, if a job site is odd-shaped and orienting the grass grain in the standard direction increases the material cost, then you may elect to install in a different direction. Alternatively, you could consider a 13-foot-wide product rather than a 15-foot-wide to reduce material waste.
Water conservation is of interest to all: individuals, businesses, and policymakers. Protection of water began in 1948 when the Clean Water Act was signed into law. Since then, water as a resource has been looked at in an entirely new way, as an entity with integrity and intrinsic value, driving the need for more drought-tolerant landscaping.
Concerns over periods of drought and water availability have increased in recent years. More individuals, and businesses, depending on their geographical location, may even be subject to water usage restrictions due to drought conditions. As of July 20, 2021, 40.1% of the U.S. is in drought, affecting 48 states.
Homeowners, landscapers, businesses, municipalities, and many others who wish to maintain their backyards, grounds, and sports fields may feel overwhelmed by water usage restrictions. They also may feel responsible for doing their part to limit water usage and wastage.
Purchase Green does not ship remnants. All online orders must be picked up at the specific store location that was selling the remnants. For example, if a customer is viewing remnants sold at the Covina, California location, they must visit the Covina store to pick up their order. In addition, remnants are sold as is and do not come with a product warranty. Remnant widths are limited to 15′ wide and 13.1′ wide, depending on the product type.
All our artificial grass products are safe for children and pets. For pet owners, we recommend choosing a remnant that is derived from our artificial grass that has been designed for pets, like Pet Heaven or Vista Pet. We also offer Puppy Pads which come provided with disposable pads to ensure the puppy pad remains clean. Furthermore, for parents, we recommend searching for remnants derived from Playscape Pro, one of our anti-static and anti-microbial artificial grasses.
No, our remnants are not defective. They are merely leftover pieces of artificial grass that are still in usable condition. Moreover, our artificial grass has been designed to be cut and shaped to cater to customers’ needs. They are derived from artificial grass types that are resistant to UV exposure and extreme weather conditions. Moreover, our artificial grass products last up to twenty-five years – meaning under normal circumstances, remnants will provide years of service. Customers can rest assured that the quality and integrity of our artificial grass remnants match that of the larger rolls they are derived from.
Artificial grass remnants are an incredible investment for homeowners and professional contractors seeking to enhance outdoor and indoor living spaces. This article aims to answer all the frequently asked questions about artificial grass remnants people may have. Find the answers to all your remnant-related questions below and the exciting possibilities they offer.
What Is an Artificial Grass Remnant?
There are often portions remaining on a brand new roll of grass, usually in lengths of 5′-12′. This is known as an artificial grass remnant.
It can be difficult to encourage children to get out in the great outdoors during the Spring/Summer months with so many obstructions online. With the weather starting to warm up in the UK, there’s no reason to not take advantage of the wonderful weather.
We’ve put together some garden activity ideas for kids this Summer to help them get creative and to create memorable experiences together as a family.
DIY Birdhouses
With recycling and up-cycling being at the heart of many UK households, we can utilise existing items and transform them into beautiful garden creations. Looking at your recycling materials before throwing them in the bin, could you utilise any finished and clean juice cartons, milk bottles, plastic boxes to create a birdhouse or feeder.
Get out various craft accessories, such as paint, coloured pens, stickers or natural items discovered in the garden to decorate. Let the kids help decide where to place the homemade bird feeder and note down the chippy friends as they enter the garden!
Garden Sketching
All you’ll need is a pen and paper for this activity. See what interests your child the most in the garden, whether that be a plant, flowers, birds, insects or your household pet and let your little artist draw to their heart’s content.
If your child is a frequent drawer or enjoys it, why not start a scrapbook? Not only is it great to keep all their artwork in one place, but also is a great way to reminisce when they’re all grown up.
If you’re choosing paint, over sketching, why not suggest it on a sunnier day so their masterpieces will dry much quicker?
Nature Art
Grab an old bedsheet or piece of fabric for the background let your little ones head on a scavenger hunt for natural materials in the garden to create a perfect picture.
Encourage your children to pick up objects around the garden, such as: stones, sticks, leaves, flowers (if permitted) to create their own story.
Rainbow Arts & Crafts
With the rainbow becoming the symbol of solidarity with NHS workers on the frontline, why not getting creative with your children to show your support? This could be painted, drawn, chalked on the pavement, paper plates, finger painting, using coloured paper as a collage – anything!
Place these showpieces when your neighbours and members of your community can see and to showcase your child’s work.
Cut 4 pieces of timber to the same height of the window. Secure two of the posts against the inside of the front wall. Decide how wide you want your bar to be. We would recommend half a metre (50cm) wide. Use your measuring tape to measure the distance and mark the floor with a pencil. Once you are happy, secure them in place.
Step 2 – Create the top of the bar
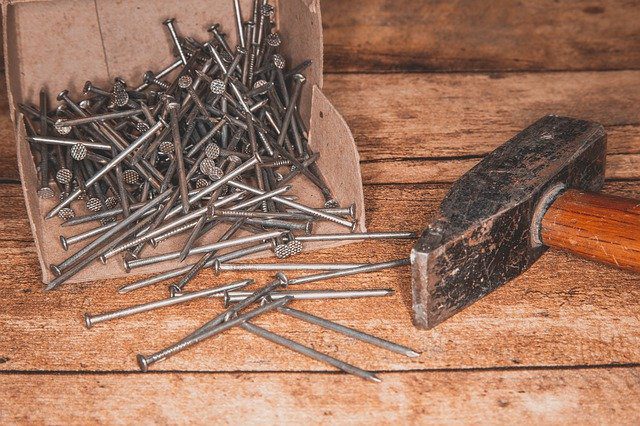
Create the top of your bar by cutting some plywood into shape. This should sit on top of the support posts, with a slight overhang at the front if you would prefer. Once you’re happy with the placement, secure it into place using a hammer and nails.
Step 3 – Cover the exposed side
To ensure that everything you store under the bar stays hidden, you can cover up the exposed side using some plywood. Measure the height of the posts and the width of the bar to find the dimensions. Once you’ve cut the plywood into place, secure it onto the side of the bar using a hammer and nails.
And there you have it! An outdoor bar in your own garden, perfect for entertaining guests and celebrating with your family.
Added Extras
Put up shelves on the back wall
To store your alcohol, you can put up some shelves on the back wall. Make sure they are level using a spirit level, and add some brackets underneath for extra support.