Is your decking looking a little tired and worn after winter? You could spend hours cleaning, treating and staining your decking. Or, you can lay artificial grass on your decking. It’s a durable, high quality solution that looks great. We have outlined the process below and answered your burning questions.
Can You Lay Artificial Grass on Decking?
Yes, you can lay artificial grass on decking. It’s a popular option for families and retired couples. It also works really well for families with dogs or other pets.
It does need an underlay and some preparation but it still works as an attractive and affordable landscaping option.
Below, Hayley Leitch talks about how artificial grass works for her family. She’s the star of Obsessive Compulsive Cleaners, and her own Youtube channel, Hayley’s Help.
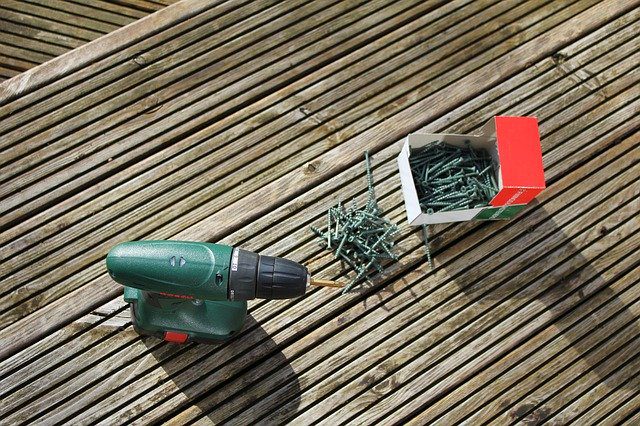
You should now move on to building the decking in front of your bar. Measure your decking boards to fit the space between your shed and the end of the platform. Safely cut them to size using a chop saw.
Step 2 – Secure the decking boards
Next, lay down your decking boards to ensure they fit correctly, using a spirit level to check they are level. You can then fix them into place, using 50mm screws.
Step 3 – Add posts to the corners
Add some wooden posts to the corners to support your handrail. Once they are level, fix them into place with some 100mm screws.
Step 4 – Add the railings
Cut the railings into the right length and screw them into place. Make sure these are extra secure.
Step 5 – Insert some spindles
Finally, cut some spindles to the correct length and secure these into place, evenly distributing them. We would recommend securing them two inches apart.
On long summer evenings, we all love to spend time in the garden with friends and family and have a barbecue. By creating your own outdoor bar, you can entertain your guests all night long. This is a great idea for your back garden, as well as for restaurants and pubs.
You can build your own structure using timber, or for an easy alternative, you can use a wooden shed as the main structure. Follow our helpful instructions to build your own outdoor bar or for general garden bar ideas to make the most of your summer evenings.
Before You Start
Before you start building, you need to prepare the area in which you’ll be building your bar. Remove any garden furniture or debris, sweep up any leaves, and ensure that the ground is level. If this preparation requires moving or lifting heavy items, ensure that you ask a family member for help.
You will need a fair amount of equipment to ensure that your outdoor bar is safely put together. We have included the equipment to build a platform for your bar to sit on, as well as the recommended shed style for your bar.
Following the preparation stage, you should now look to apply a non-oil-based moss killer onto the artificial grass/lawn. However, for the best results, we recommend doing so when the moss is actively growing and only when weather conditions are dry and no moisture is present/anticipated for several hours.
It is also vitally important to follow the manufacturer’s instructions as not all moss killers are the same. Following this, you should look to thoroughly rinse off the moss killer (if the manufacturer states). Once the moss has dried out and died, you will need to sweep/rake it to one side to make collecting and binning it easier.
And that’s it – for now at least! We do recommend that you reapply the moss killer once every few weeks if you continue to see moss growth.
If you need any further advice on artificial grass maintenance, get in touch with our friendly team.
Invented over 50 years ago, artificial grass is a surface of synthetic fibres made to look identical to natural grass. Today, you can find it nearly everywhere you look, from residential lawns to sports centres and stadiums.
Compared to conventional grass, artificial grass is able to stand up to heavy use whilst needing no trimming or irrigation – making it perfect for those who need a low-maintenance lawn. However, this isn’t to say that it’s “maintenance-free”. Like all man-made products, artificial grass does have a limited life span. However, with the proper maintenance and care, you can expect it to last up to (and even beyond) it’s estimated lifespan.
When caring for artificial lawns, one of the main issues owners face is moss. This typically takes the form of dense green clumps or mats and often occurs in damp or shady locations. Luckily, the method for removing moss is straightforward and can be done with relative ease. The basic steps are outlined below.
Preparation
Before you start, here’s a list of things that you’ll need:
A soft-bristled broom/brush or plastic rake
Moss killer (preferably non-oil-based)
Pruning shears or loppers
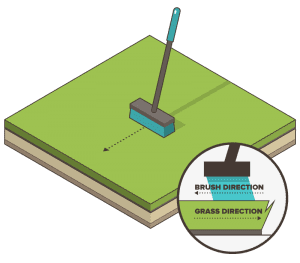
Once you’re ready, you’ll need to brush/rake the artificial turf – we recommend you do this either weekly or whenever debris accumulates.
When it comes to brushing/raking, you should alternate your direction each time to ensure a deep clean. This will also help prevent all the fibres from leaning in one direction.
Once all debris is clear, take your pruning shears/loppers and go around the garden/lawn and trim back any overhanging branches and overgrown vegetation. This will allow for better circulation of air whilst allowing more sunlight to reach the lawn. The goal here to try and eliminate the conditions that favour moss development.
When you install artificial grass, you may not think you’ll have to deal with weeds. After all, you are covering up the native soil.
Properly installed new or used artificial grass will indeed prevent weeds from growing through the turf’s backing.
However, weeds can still push against the bottom of the artificial turf and disfigure it.
Weeds are uncommonly good at finding ways to grow in unlikely places. Thankfully, there is a solution: use weed barrier fabric to prevent unsightly lumps and bumps in artificial turf projects.
Although we recommend weed barrier in most cases, there are some situations where you should avoid installing it under synthetic turf.
Some types of damage could cause your artificial turf to lose color. Meanwhile, some pieces of used synthetic grass may not be perfectly uniform in color. Instead of fixing artificial grass with patches, you can use color-matching turf paint.
Spray-painting discolored or faded blades can give your used grass a fresh new look.
What To Do After Initial Repairs Once you finish minor artificial grass repairs, you need to:
Blend the repair – use a soft-bristled brush or broom to brush the fibers of the repaired area and the surrounding turf together.
Inspect the repair – make sure the repaired area is secure and well-blended.
With the right approach, minor repairs remain invisible and don’t interfere with day-to-day use.
Minor synthetic turf repair isn’t complicated. If you discover small issues with your used artificial grass, you only need several tools and a few minutes.
artificial_turf_strips
Tools and Materials for Repairing Artificial Grass Tears These tools can help you fix the majority of minor problems with your artificial turf:
5-inch nails
Hammer
Box cutter
Turf glue (optional)
Seam tape (optional)
Turf paint (if needed)
Spare strips of artificial grass (if needed)
The above tools should be sufficient for preparing minor issues. If, in the process, you discover that the problem is more significant than you thought initially, you can always stop the repair and request professional assistance.
Before restoring artificial turf, you must understand where the damage comes from. By digging deeper into the underlying cause, you can prevent the problem from happening again.
Weeds and wildlife
If you don’t install weed barrier fabric or gopher wire underneath the artificial turf, pests and weeds can try to make their way through the surface. This can lead to bumps and wrinkles.
When artificial grass surface becomes uneven, it doesn’t just affect the appearance. It makes the turf more susceptible to UV light and heavy foot traffic damage. Bumps can also become a tripping hazard.
Transportation
During transportation, forklifts and other heavy machinery puncture the artificial turf to move it. That’s why inspecting the turf during installation is imperative.
Extreme Heat
While UV-resistant artificial turf does an excellent job protecting the green sheen of the turf, it does not handle extreme heat well. Since the turf is made from synthetic materials, such as polyethylene, polypropylene, and nylon, it can melt or deform after coming into contact with hot objects.
These issues can occur when a cigarette or coal from the grill falls on the turf. Sunrays reflected from windows or other objects can have the same effect.
Extreme heat softens infill and causes compaction. This, in turn, affects cushioning and drainage. Swings in temperature from very hot to very cold can cause the turf to expand and contract. This results in wrinkles and bubble formation.
Freezing Cold
When temperatures drop below 32°F, artificial turf fibers may become stiff. This makes them less flexible. Meanwhile, frozen infill causes the surface to become hard and less cushioned. This makes it easier to damage the turf with regular use.
Similar to extreme heat situations, the turf contracts and expands when temperatures fluctuate. This may cause the artificial grass to wear out faster.
Heavy Foot Traffic
The fibers can become matted if many people and pets regularly walk over the artificial grass. Meanwhile, installing heavy lawn furniture or parking a car on artificial grass can lead to large matted patches. Matted fibers make the surface look less natural.
Uncleaned Pet Waste
If pet waste remains on the artificial grass’s surface for too long, it can cause unpleasant odors and bacterial growth. The artificial turf will lose its lush color and develops permanent stains over time. Meanwhile, the waste can contaminate the infill and clog drainage systems.
Cleaning and restoring artificial turf after pet waste remains there for a long time may be impossible. You would have to replace the contaminated patch.
Artificial grass is created in such a manner that it incorporates UV inhibitors, ensuring that your lawn remains lush and green for many years. UV inhibitors are included in the yarning process, ensuring that each synthetic grass blade retains its color for at least a decade.
That’s in contrast to actual lawns, which, as anybody who has ever been responsible for the management of a real lawn knows, grow yellow and spotty after only a few days of insufficient rain and sunlight. That is one less burden on your shoulders.